
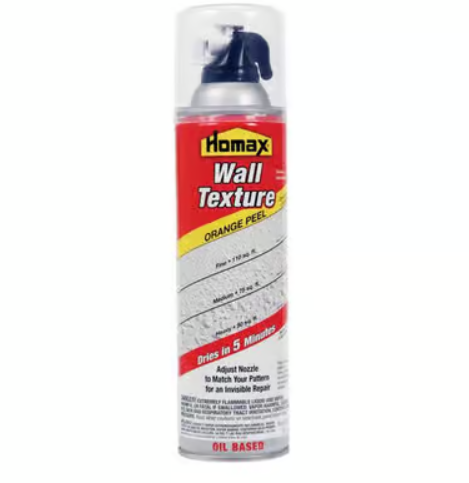
Homax Wall Texture White Oil-Based Wall and Ceiling Texture Paint 20 oz
- Match existing interior wall textureNo more bald spotsConvenient aerosol applicationJust shake the can, adjust the nozzle and spray
Finding the Right Homax Wall Texture for Your Project
If you’re looking to add interest and dimension to your walls, Homax wall texture is an easy and affordable option. With so many textures and finishes available, it can be tricky to decide which Homax wall texture is best for your project. This guide will walk you through the key factors to consider when selecting a Homax wall texture, from room size to desired visual effect. We’ll also cover proper application, care, and removal tips to help you achieve beautiful, long-lasting results. Let’s dive in!
The type of Homax wall texture you choose can drastically change the look and feel of a room. Spray-on textures like orange peel or knockdown create subtle visual depth, while heavy trowel-on finishes like sandstone or stucco offer high relief with dramatic shadows. Consider the mood you want to create, as well as the size of the space. Large rooms can handle bolder textures while smaller spaces are better suited for low-profile finishes.
Sheen is another important factor. Matte finishes minimize imperfections in the wall surface but add a casual vibe. Glossy or metallic sheens create a more glamorous effect. Eggshell textures offer a nice compromise between durability and shine. Make sure to get sealant if you choose a metallic finish, as they show scuffs more easily without a protective topcoat.
For high-moisture areas like bathrooms, moisture-resistant textures are a must to prevent peeling and damage. Spray textures like knockdown and orange peel are water-resistant out of the box, but trowel finishes need a waterproof adhesive for best results. Homax offers moisture-resistant versions of many popular textures like stucco and sandstone.
Consider heavy vs. standard texture. Heavy textures like coarse sandstone provide deeper grooves and shadows for a dramatic statement. Standard versions offer more subtle relief. Heavy textures are tougher to apply evenly on ceilings or small walls, so plan accordingly.
Sample boards are the best way to visualize options. Most home improvement stores have Homax display boards showing swatches of their various texture styles. Study these and bring home samples of your favorites to view in the actual room before making a decision.
Proper Application of Homax Wall Textures
Now that you’ve selected the perfect texture, proper application is key to achieving beautiful results with Homax. Follow these tips for a flawless finish:
Always prep surfaces thoroughly. Remove any wallpaper or old texture, fill any holes or cracks, sand bumps, and clean away dust and oils. Priming ensures maximum adhesion.
Follow instructions carefully, especially when mixing texture compounds. Don’t attempt to thin ready-mixed textures as this can ruin the formulation. Stir frequently during application to keep aggregates suspended evenly.
Maintain a wet edge by working in sections and blending each new application into the last while still wet. This prevents lap marks and variances in texture. Work to natural breaks like corners when possible.
Apply multiple thin coats for spray textures versus one thick coat. This prevents dripping or sagging. Allow proper drying time between coats as specified on the can.
Use a clean drywall trowel and apply trowel-on textures in uniform thickness. Hold the trowel at a consistent angle and use smooth strokes to create an even pattern.
Knock down high points for textures like orange peel using a plastic knockdown knife. This creates uniform peaks by leveling any ridges or globs. Apply knockdown finish lightly in a circular motion.
Perfect corners and edges with a small brush or spatula to prevent buildup. Feather out the texture to blend it smoothly into the main wall area.
Use painter’s tape for clean lines. Apply tape along trim, baseboards, and ceilings prior to texturing, then remove before drying is complete. This prevents bleed-through at edges.
Allow proper dry time based on humidity before painting or sealing. Low humidity may require longer dry times to prevent premature sealing over damp texture.
Tips for Choosing the Right Paint Colors and Finishes
The paint you choose plays a big role in determining the finished effect of the wall texture. Here are some tips on coordinating texture and paint successfully:
Light colors help textures pop while darker hues tend to downplay the relief and shadows. Softer tones also minimize the appearance of flaws and imperfections in the texture.
Flat or matte paint enhances the look of trowel finishes beautifully. The lack of sheen allows the texture dimension to take center stage.
Metallic texture coatings pair best with midtone paint shades like warm grays, taupes and beiges. This creates pleasing contrast between the finish and base color.
Eggshell or satin paint finishes work nicely with knockdown and other low-profile spray textures. The subtle sheen adds depth while still letting the texture show through.
High-sheen gloss enamels can overpower heavy textures. Reserve them for featuring smooth painted surfaces like molding or trim. Use sparingly as accents on main textured walls.
Look for tintable texture compounds like Homax’s Lite-Weight spackle if you want colored texture. Tinting the material itself delivers more consistency than painting over white texture.
Apply primer tinted close to the finish paint color when painting over existing texture. This prevents having to apply multiple coats of paint for full coverage.
Do test patches with paint samples before final application. Look at the samples at different times of day to see how lighting affects the finish color over texture.
Using Homax Wall Texture on Ceilings
Homax wall textures can absolutely be applied to ceilings for a dramatic decorative effect. Follow these tips for success:
Stick with spray textures or lightweight trowel options. Heavy ceiling textures like coarse sandstone risk sagging or even falling if improperly applied to overhead surfaces.
Prime ceilings before texturing. Unprimed drywall soaks up moisture easily. Priming prevents absorption issues that can lead to adhesion failure.
Choose more muted textures for ceilings. Subtler styles like orange peel and fine sandstone work better than bold finishes like heavy knockdown. Let the walls take the starring role.
Incorporate ceiling breaks. Mark off borders or center medallions with trim to break up large expanses. This makes the space feel more intimate and the texture less overwhelming.
Add ceiling texture last. Wall textures often overspray slightly. Leaving ceilings bare until walls are done keeps them looking clean and fresh.
Consider skip trowel technique on ceilings. Dragging a trowel over lightly textured ceiling compound creates attractive vertical striations. This technique minimizes rough textures that become exaggerated overhead.
Install ceiling fixtures and vents before texturing. Cutting holes through thick texture finishes risks crumbling and cracking around openings. Mark their placements first and avoid texturing immediately around them.
Hire a pro for challenging ceiling projects. Very high or awkwardly angled ceilings are difficult for DIY application. A texturing professional has the right tools and experience to handle tricky overhead projects flawlessly.
Prepping Walls for Texture
Since Homax texture compounds adhere directly to bare surfaces, proper prep work is crucial for creating a durable, long-lasting finish. Here are some key steps:
Fill any cracks, holes or gaps. Use drywall joint compound to patch imperfections for a level surface. Avoid thick buildup in small areas to prevent cracking.
Sand down any bumps or ridges. Scuff sand painted walls to degloss and remove burrs or bumps. Smooth, flat surfaces allow texture materials to bond tightly.
Wash walls with TSP or other degreaser. Grease and dirt impede adhesion. Tack cloth after washing to remove all dust and debris missed in cleaning.
Apply alkali-resistant primer. Specific texture primers chemically prepare walls for bonding. They also even out porosity differences for consistent results across the surface area.
Prep for moisture-resistance. Use waterproof adhesive in bathrooms, kitchens and laundry rooms before applying moisture-resistant texture. Consider mold-killing additives like Microban for high-humidity areas.
Isolate textured walls from other surfaces. Tape off baseboards, crown molding, windows and door trims to avoid overspray. Drape fixtures and furniture as well for easy clean up.
Coordinate electrical and plumbing. Install outlets, switches, vents and lighting ahead of time since cut-ins will damage the texture finish. Patch any unavoidable holes before applying texture.
Repair drywall seams and corners. Joint compound and corner bead ensure edges blend smoothly and resist cracking as the texture dries and contracts. Feather out buildup for an even finish.
Cleaning and Care for Homax Wall Textures
Homax wall textures are designed to be durable and low-maintenance finishes. However, the right care is required to keep them looking like new:
Let texture fully cure before cleaning – typically 2-3 days. Premature washing risks smearing or damaging the finish before it sets completely.
Gently dust textured walls as needed between full cleanings. Use a microfiber duster or soft brush rather than harsh scrubbing.
Vacuum trowel finishes using the soft brush attachment. This lifts debris from the texture without abrasion.
Use mild soap and water. Avoid harsh cleaners or abrasive scouring pads which can mar the texture coating. Gentle washing prevents fading or eroding the finish.
Spot clean stains carefully. Rinse thoroughly and dab dry with a clean microfiber cloth to prevent water marks. Avoid excessive rubbing.
Repair minor damage promptly. Scrapes or gouges in heavy trowel textures can be patched using the original texture compound. Sealing repairs blends them to match surrounding areas.
Address moisture issues quickly. Standing water or chronic condensation can compromise paint and texture, resulting in stains, peeling and mildew. Proper ventilation and leak repair prevents major damage.
Reseal textured walls periodically. Fresh sealant helps the texture resist staining, moisture damage, and grime buildup. Ideal for maintaining kitchens and bathrooms.
Removing and Replacing Homax Wall Texture
Over time, wall texture finishes can become damaged or simply go out of style. Removing Homax texture entirely is an involved process, but it allows for a fresh start:
Age the texture thoroughly before removing – ideally 30 days. New texture is prone to ripping off in sheets rather than scrubbing off cleanly.
Score the surface. Use a scoring tool, wire brush or stiff-bristled broom to rough up and break the texture coating seal. Avoid gouging too deeply.
Apply texture remover solution. Products like Safe and Simple or Homax Degripper penetrate and swell the texture layer. Allow the stripper to dwell and reapply as needed.
Gently scrape off softened texture. A putty knife or paint scraper works well for large areas. Scrub with abrasive sponges or brushes for stubborn spots. Rinse often while working.
Smooth and prep the bare surface. Once stripped, sand any remaining texture residue or adhesive bumps. Fill divots and reprime the raw drywall before applying fresh texture.
Overlap new texture slightly into existing finishes for the best seamless results. Use fine sandpaper to feather out the transition line between old and new.
Resealing provides added protection over new texture borders. Clear acrylic sealants prevent moisture intrusion where the existing and fresh textures meet.
Painting Over Homax Wall Texture
Homax textures are designed to work with a wide variety of paints to allow customizing the finish:
Check texture package for recommended drying time before painting, usually 24-48 hours. Painting too soon can ruin the paint’s adhesion and finish.
Apply primer before painting for optimal coverage, especially with darker hues. Primer also ensures consistent absorption across the textured surface.
Use high-quality latex paint. Avoid flat paints which offer minimal protection and durability. Satin, eggshell and semi-gloss finishes work best over texture.
Apply paint generously using a 1/2” to 3/4” nap roller. Work in overlapping “W” and “M” patterns, maintaining a wet edge between sections to prevent lap marks.
Add a second coat for complete coverage and color accuracy, especially for drastic color changes. Touch up missed spots with a tapered trim brush.
Inspect in both natural and artificial light. Texture can camouflage patchiness that’s only revealed under the bright illumination of overhead lighting.
Let paint fully cure – about 30 days- before cleaning or applying additional protective sealant. Cured paint is less prone to cracking or chipping over textured surfaces.
Using Homax Wall Texture Outdoors
While designed primarily for indoor use, some Homax textures can work beautifully and durably on exterior surfaces:
Stick with aggregate-based textures. Heavier finishes like granite and stucco stand up to outdoor exposure better than lightweight textures like orange peel.
Use moisture-resistant adhesive to prevent mildew growth behind the texture. Outdoor adhesive binds securely even with seasonal humidity fluctuations.
Seal outdoor texture thoroughly. Waterproofing sealants protect the texture from rain, sprinklers and inclement weather which can damage the coating and cause cracking/peeling over time.
Avoid spraying on windy days. Breezes disperse the texture material unevenly, resulting in thin spots and drips. Calm days allow the product to be applied smoothly and evenly.
Check with your HOA. Community rules may prohibit certain finishes. Make sure to get architectural approval before texturing exterior surfaces visible to others.
Hire a professional for multistory homes. Specialized equipment and expertise is required to safely apply heavy texture finishes on upper stories. Leave tall ladders and scaffolding to the experts.
Refresh sealants periodically. Reapply outdoor-grade sealant every 2-3 years. Check for signs of wear like fades, cracks or pinholes and address these promptly to avoid moisture damage.
Common Problems and DIY Fixes
No need to panic if your texture project hits a snag. Here are some common issues and tips for troubleshooting:
Lap marks – Prevent by maintaining wet edge. Disguise with stipple brush after drying.
Uneven texture – Knock down high points; skim coat thin spots after drying.
Overspray – Dampen and gently scrape while wet; fine sandpaper when dry.
Cracking – Seal when dry; patch large cracks with compound, sand and repaint.
Peeling – Remove loose texture; wash, prime and reapply new texture.
Mildew – Scrub with bleach solution; treat source of moisture issue.
Staining/yellowing from smoke or grease – Seal with stain-blocking primer before repainting.
Flaking near corners – Prefill inside corners with setting-type joint compound for more durable finish.
Blistering – Allow more dry time between coats. Insufficient drying causes trapped moisture.
Achieving a Professional Finish
Homax wall textures offer a fast, affordable way to get high-end designer finishes. Follow these pro tips and tricks to get flawless, polished results:
Mimic trowel textures with paint rollers – Use textured rollers made from hardened foam, looped fabric or mohair fabric to emulate finishes like Venetian plaster or skip trowel.
Layer multiple textures – Combine a heavy trowel base coat with a lighter knockdown finish on top for extra depth and interest.
Incorporate color washes – Dilute paint or glaze colors and apply as a thin translucent topcoat to add an elegant patina over texture.
Highlight architectural details – Define alcoves, ceiling beams and decorative recesses with bolder textures to make them focal points.
Create a chair rail border – Contrast upper and lower textures divided by a painted chair rail line. Great for dining rooms and bedrooms.
Use large-scale templates – Cut interesting shapes from cardboard or plastic to mask off sections and selectively apply specialty textures.
Add lighting effects – Install sconces or picture lights to cast shadows and highlight the relief of dramatic trowel textures.
With the right prep work, application techniques, and creative vision, Homax wall texture lets anyone achieve magazine-worthy designer finishes affordably. Follow this guide and you’ll be on your way to creating stunning interiors with unique texture and dimension.