
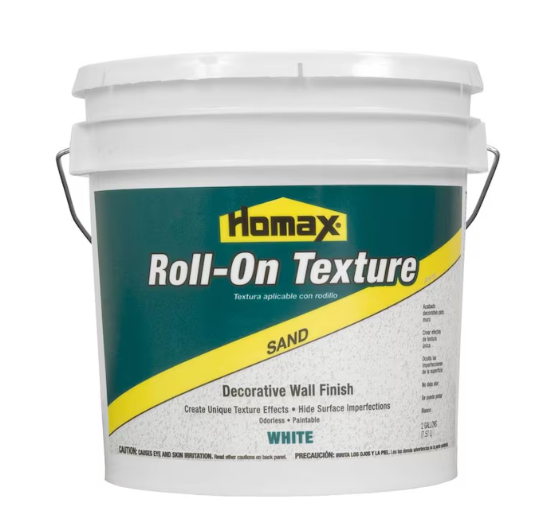
Homax Roll-on texture 2-Gallon White Sand Water-based Wall and Ceiling Texture Roller
- Decorative wall finish
- Creates unique texture effects
- Hides surface imperfections
Creating Unique Wall Finishes with Ease
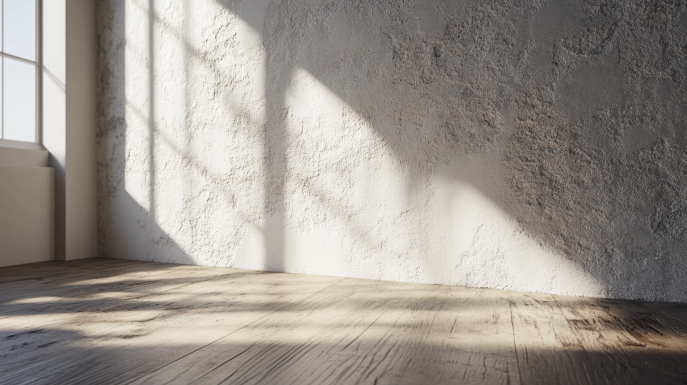
If you’re looking to add interest and dimension to your walls without the mess and frustration of traditional wall textures, Homax Roll On Texture is an easy-to-use product that allows anyone to achieve a customized look. With various texture options like orange peel, knockdown, and splatter, this versatile roller-applied coating opens up endless design possibilities.
But before you start painting patterns on your walls, it’s important to understand how to properly use Homax Roll On Texture. From prep to application to cleanup, there are some key steps to follow in order to get the results you want. This comprehensive guide will walk you through everything you need to know about working with Homax Roll On Texture for stunning finishes.
Choosing the Right Roll On Texture
Homax offers several different roll on wall textures to suit a variety of design needs:
- Orange peel – This fine spatter texture has a mottled look that mimics the surface of an orange peel. It provides subtle interest and works well on walls and ceilings.
- Knockdown – For a lightly stippled effect, knockdown texture has a soft irregular pattern. It’s a versatile and easy-to-use option.
- Splatter – As the name suggests, this texture has a random splattered effect. Use it to make a bold statement or achieve a heavily textured Venetian plaster look.
- Crows feet – Thin uniform lines characterize this directional striated texture. It adds linear visual interest to walls.
- Popcorn – For a stucco-like finish, popcorn texture provides heavy spatter. It works well on ceilings and adds lots of depth.
Consider the look you want and where you plan to use the texture when deciding on the finish. Orange peel and knockdown work well on walls and ceilings, while heavier splatter effects make more of a statement on accent walls.
Getting the Right Supplies
Applying roll on texture is an easy process, but you do need a few supplies:
- Paint roller – Use a high quality 1/4″ – 3/8″ nap roller sleeve for the basecoat and texture coat. Avoid foam rollers which don’t hold enough texture material.
- Roller frame – Choose a sturdy roller frame that accommodates the roller sleeve. Comfort grip handles allow for easier rolling.
- Paintbrush – Keep a brush on hand for cutting in corners and edges. Angled sash brushes work well.
- Paint tray – A standard roller tray with ridged interior is ideal for loading the texture material evenly onto the roller.
- Drop cloth – Lay down cloth or plastic sheeting to protect floors and furniture from splatter and drips.
- Painters tape – Tape off any adjacent surfaces you don’t want to get texture on such as trim or baseboards.
With the right simple supplies, you’ll be able to apply Homax Roll On Texture with ease.
Prepping Your Surface
Proper surface prep is crucial for getting great results with Homax Roll On Texture. Follow these steps:
- Make sure the surface is clean and dry. Eliminate any dust, dirt, oil, or flaking paint that could prevent adhesion.
- Repair any imperfections like cracks, holes, or grout lines. Use spackle or caulk as needed so the texture coating goes on smoothly.
- Sand glossy surfaces with 120-150 grit sandpaper to rough up the finish so the texture material can grip.
- Apply primer if painting over an uncoated surface or changing colors. Use a high quality primer suited for your wall material.
- For new drywall, apply a drywall sealer so joints and fasteners don’t show through the textured finish.
Proper prep leads to better results. It’s worth taking the time to correctly prepare surfaces before starting texture application.
Choosing a Base Color
For a seamless integrated look, it’s best to apply a base color coat before the texture. This allows the base color to show through the thin textured finish.
Consider the existing color scheme and the texture pattern when selecting a base color. For heavy knockdown or splatter textures, opt for a bold base color as less of it will show through. Neutral earth tones work well to provide a subtle variegated effect under lighter textures.
Use a flat or matte paint for the base color coat. High-sheen paints prevent proper adhesion of the texture material. Apply at least one coat of base color, allowing it to fully dry before adding texture.
Picking a coordinating base color enhances the textured finish and pulls the whole look together.
Applying the Base Coat
Homax Roll On Texture requires a specially formulated base coat designed for use with the product. Make sure to use the coordinating base coat recommended for your texture finish.
Follow these application tips for the base coat:
- Stir or shake the base coat well before using to fully mix the contents.
- Pour some of the material into your paint tray. Fully load the roller by rolling it back and forth in the tray.
- Use overlapping up and down strokes as you roll on the base coat, maintaining a wet edge as you work.
- Work in 2-3 foot square sections, applying the base coat evenly and consistently over the surface.
- Re-wet the roller after completing each section to prevent drying.
- Allow the base coat to dry fully before applying the texture.
The base coat provides an ideal surface for the texture coating to adhere to. Taking your time leads to better results.
Rolling On the Texture
Once the base coat has dried, you’re ready for the fun part – applying the Homax Roll On Texture! Follow these steps:
- Stir the texture compound well before using. The particles tend to settle.
- Pour some of the material into a roller tray. Load the roller fully by rolling back and forth.
- Apply in 2-3 foot square sections using steady, even strokes. Overlap strokes slightly.
- For heavier textures like knockdown or splatter, use a lightly loaded roller. Roll lightly to allow the texture to show through.
- Work quickly, maintaining a wet edge as you apply the texture.
- Work from the top of the wall down. Apply lightly and randomly for varied effects.
- If desired, go back over areas with a dry brush to knock off high points and create effects.
The beauty of roll on texture is that it’s easy to manipulate the finish and create different look as you apply it. Go for bold or subtle – the possibilities are endless!
Achieving Different Textured Effects
One of the great benefits of Homax Roll On Texture is that you can vary the application technique to achieve different effects. Get creative with the finish!
For a bold splatter look:
- Load roller lightly and randomly splatter texture onto surface. Leave some areas uncoated.
- Optionally knock back high points with a rag or brush for depth.
To mimic a hand-troweled look:
- Load roller heavily and apply texture in different directions – up, down, circular.
- Knock down high points with brush strokes going different ways.
For a subtle orange peel effect:
- Roll on texture lightly and evenly to create a uniform fine texture.
- Use a dry brush to gently smooth out any heavy areas.
Don’t be afraid to play around and discover new techniques. The more you experiment, the more unique effects you’ll create!
Protecting Surfaces and Cleanup
Roll on texture can be messy, so proper prep and protection of surfaces is a must. Here are some tips:
- Use painter’s tape and plastic sheeting to mask off any areas you want to keep texture free. Coat all surfaces you do want textured.
- Change disposable roller covers often to prevent dried texture chunks from getting in the finish.
- Try to keep drips to a minimum by not overloading roller and applying texture strategically.
- Clean tools and trays thoroughly with water before texture dries. Scrape off excess from roller before washing.
- Use a wet rag to wipe drips and splatters immediately before they dry. Avoid smearing the texture.
- If needed, gently scrape any unwanted texture off surfaces with a plastic scraper while fresh.
- Allow texture to fully dry 72 hours before removing painter’s tape.
Proper masking, quick cleanup of drips, and cleaning tools right away makes the process much cleaner and easier.
Top Tips for Using Homax Roll On Texture
To achieve truly professional textured wall finishes with Homax Roll On Texture, follow these pro tips:
- Prep properly – Thoroughly clean and prepare the surface to ensure the texture adheres well. Proper prep makes a big difference.
- Apply base coat evenly – Take your time with the base coat, applying it consistently to create a uniform surface for texture.
- Use quality roller covers – Invest in microfiber or wool blend sleeves. Avoid foam rollers which don’t apply the texture properly.
- Work in sections – Apply texture and knockdown effects in small sections so you can manipulate the finish before it dries.
- Maintain wet edge – Feather out edges of sections as you work to blend them seamlessly together.
- Explore different techniques – Try working in different directions or knockdown methods to discover unique finishes.
- Be creative – Two rooms textured identically can look totally different just by varying application techniques. Have fun with it!
Following these tips will help you create next-level textured walls with ease and professionalism.
Frequently Asked Questions
What surfaces can I use Homax texture on?
It can be used on most interior wall and ceiling surfaces including drywall, plaster, concrete, wood, metals, and more. Ensure the surface is properly prepared first.
How long does it take to dry?
At 70°F and 50% relative humidity, the texture dries to the touch in about 1 hour. It takes a full 72 hours to fully cure and harden. Drying times vary based on temperature, humidity and texture thickness.
Can I paint over the texture?
Yes, once fully cured, Homax texture can be painted with either latex or oil-based paints. To maintain the depth of the texture, use flat or matte finishes.
How do I do repairs or touch-ups?
Gently scrape off any damaged sections and recoat the spot using the same Homax texture, matching the application technique. Feather out edges for best results.
What’s the coverage?
The coverage of Homax texture varies based on the type of texture and thickness applied, but approximately 300-400 square feet per gallon.
How should I store leftovers?
Tightly seal containers of unused Homax texture and store in a climate controlled location away from moisture. Texture lasts up to 2 years when stored properly.
Achieve Your Dream Wall Finishes
With its ease of use and endless possibilities for creating unique finishes, Homax Roll On Texture is an ideal solution for DIY’ers of any skill level to makeover walls and ceilings. Follow this guide to pick the perfect texture, properly prepare surfaces, and experiment with application techniques. Your newly textured space will add loads of character and visual interest to any room.