
Transforming Tired Surfaces into Tile-Like Finishes
If you’re looking to upgrade your home on a budget, Homax Tough As Tile may be the perfect solution. This unique coating can give old, worn surfaces a brand new tile-like finish for a fraction of the cost of a full renovation. But how exactly does it work and is it right for your next project? This comprehensive buying guide will tell you everything you need to know.
What is Homax Tough As Tile Used For?
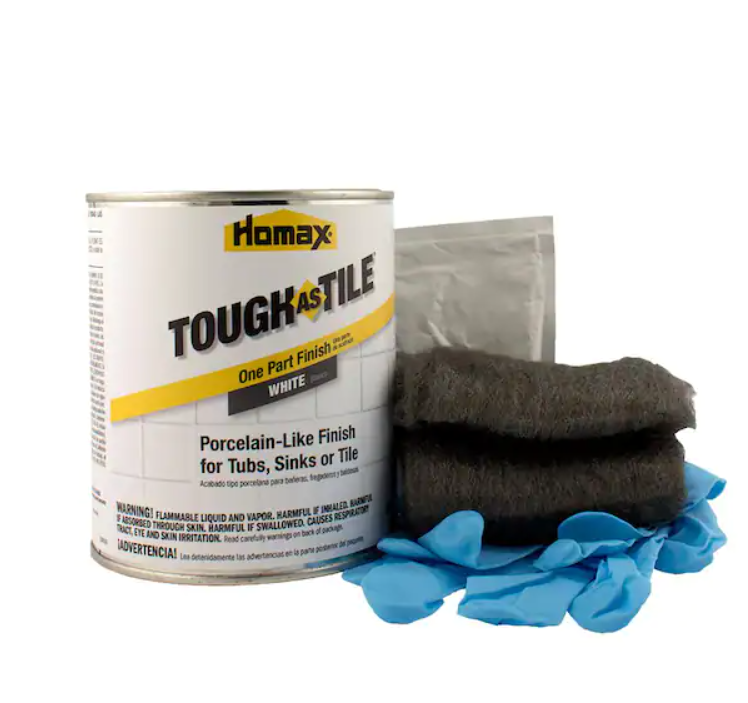
Homax Tough As Tile is a water-based acrylic coating that is specially designed to resurface old sinks, showers, countertops and even floors. It creates a textured, grout-line look that mimics the appearance of real ceramic or porcelain tile. Unlike messy epoxy resurfacers, it applies easily with a brush or roller and dries to a durable, groutable finish.
Tough As Tile adheres well to most sound surfaces including cultured marble, fiberglass, laminates, wood and more. It’s great for giving dated bathrooms or kitchens a fresh new look without messy demolition. The tile-like coating stands up well to moisture and everyday wear and tear. And unlike paint, it won’t chip or peel.
How Do I Apply Homax Tough As Tile?
Applying Tough As Tile is a quick and easy process. Just follow these basic steps:
- Clean the surface thoroughly – Use a degreasing cleaner to remove any residue or soap scum. Rinse and let dry completely. Scuff sand glossy surfaces.
- Repair any damage – Fill holes, chips and cracks with spackling. Sand smooth when dry.
- Prime if needed – For porous or heavily stained surfaces, apply a primer/sealer so the coating adheres properly.
- Stir the coating before using – Mix well to incorporate the texturing material evenly throughout the bucket.
- Apply two coats with a brush or roller – Use smooth strokes and work in sections. Let the first coat dry 2-4 hours before the second coat.
- Let cure 24-48 hours before grouting or exposing to heavy use.
That’s really all there is to transforming your out-of-date surfaces with Tough As Tile! Proper prep and application will ensure long-lasting results.
Where Can I Buy Homax Tough As Tile?
Homax Tough As Tile is sold at most major home improvement stores like Home Depot, Lowes and Menards. It’s available in 1-quart, 1-gallon and 2-gallon plastic buckets. Expect to pay around $25 for a quart, $50 for a gallon and $90 for 2-gallons.
You can also purchase it from online retailers like Amazon or through specialty coating suppliers. Make sure to factor in any additional shipping costs if ordering online. Always buy from authorized sellers to ensure you get authentic Homax products with the full warranty.
Check the Homax website for a store locator to find Tough As Tile available in your area. Be aware that inventory does sell out quickly at times due to popular demand. Calling ahead to verify availability is a good idea for larger gallon sizes.
Is Homax Tough As Tile Suitable for Sinks and Bathtubs?
Yes, Tough As Tile is an excellent resurfacing product for sinks and bathtubs. The textured acrylic coating is designed to withstand moisture and everyday use. Just be sure to properly prep and de-gloss the surfaces first so the coating can mechanically adhere.
For best results in wet areas:
- Allow enameled surfaces to fully cure for 30 days before applying Tough As Tile
- Use a primer made for plastic and fiberglass on slick surfaces
- Avoid excessive scrubbing and harsh cleaners which can wear down the finish over time
Tough As Tile is not recommended for floors or areas with standing water. Make sure sinks and tubs properly drain to prevent puddling. With proper care, it can revive old fixtures for years to come.
How Long Does Homax Tough As Tile Take to Dry?
Drying times will vary based on temperature, humidity and thickness applied. In general:
- First coat – Dries in 2 to 4 hours before recoating
- Second coat – Dries to touch in 2 to 4 hours
- Fully cures in 24 to 48 hours before grouting or heavy use
Applying coats too heavily or in cold conditions can double these drying times. Adequate airflow will help accelerate curing. Wait the full cure time to prevent premature damage.
If using Tough As Tile in a sink or tub, allow several days of light use for full cure. Avoid soaking or prolonged water contact for 5-7 days. The coating will continue to harden fully over the first 2 weeks.
Can I Use Homax Tough As Tile on Countertops?
Yes, Homax Tough As Tile can transform old laminate or cultured marble countertops to look like ceramic tile. Countertops see heavy daily use, so proper preparation is key:
- Countertops must be thoroughly cleaned and degreased
- Glossy surfaces should be lightly sanded to roughen
- Allow any primers or paint to cure fully before applying
- 2 full coats are recommended for durability
Avoid excessive standing water and give 72 hours of cure time before heavy use. Hot pots, pans or appliances can damage the finish if placed directly on Tough As Tile. Using a trivet or hot pad is recommended to prevent cracking or peeling.
With proper care, Tough As Tile holds up well on countertops for many years. It’s an affordable alternative to pricey replacement!
How Do I Prepare a Surface for Homax Tough As Tile?
Good surface prep is vital to ensure proper adhesion and the best results:
- Clean thoroughly with an ammonia-based degreaser or TSP substitute to remove any waxes, sealers or oils
- Lightly sand glossy surfaces to roughen up the finish so the coating can grip
- Repair any damage like chips, holes or cracks
- Apply primer/sealer if needed on porous or heavily stained surfaces
- Ensure the surface is fully dry before applying
Taking time to prep correctly will allow the Tough As Tile coating to bond tightly. Always follow the manufacturer’s recommendations for each particular surface type. Rushing this step often leads to peeling or chipping down the road.
Is Homax Tough As Tile Waterproof?
While Homax Tough As Tile is highly water-resistant, it is not 100% waterproof. The coating is designed to repel water and stand up to humidity, condensation and routine cleaning. However, any micro cracks or damage can allow moisture seepage over time.
For best results:
- Allow 2 full coats to fully seal the surface underneath
- Avoid excessive water exposure like prolonged soaking
- Immediately repair any chips to prevent water damage
- Reapply a fresh coat annually in wet areas to maintain protection
While not waterproof, Homax Tough As Tile does provide excellent water resistance for the majority of applications. Proper prep and maintenance will optimize durability.
How Durable is Homax Tough As Tile?
Homax Tough As Tile forms a hard, groutable coating that is highly durable in most residential settings. It is specially formulated to resist:
- Cracking, peeling or chipping when properly bonded
- Fading or yellowing from sunlight exposure
- Mold or mildew growth in humid environments
- Stains from typical household products
Independent lab testing shows excellent adhesion, abrasion resistance and flexibility compared to other DIY resurfacing coatings. Real-world customers report years of performance in kitchens, baths and laundries when properly prepped and cared for.
For best longevity, allow the full cure time before heavy use. Avoid gouging or scratching with sharp objects. Routinely check for wear in high traffic areas and touch up as needed.
Can I Paint Over Homax Tough As Tile?
Homax does not recommend painting over properly cured Tough As Tile. The textured acrylic coating is designed as a final finish surface. Painting over it can result in poor adhesion and peeling.
If you need to change the white Tough As Tile color, Homax suggests:
- Adding universal colorants right into the bucket when mixing
- Applying a compatible concrete stain for more color options
- Using a high adhesion epoxy paint made for tile (enamel paints will not bond)
Test compatibility and adhesion on scrap material first. Keep in mind that any additional coats will partially smooth out the tile texture. For best results, tint the Tough As Tile itself versus painting over it.
How Do I Remove Homax Tough As Tile?
To remove existing Tough As Tile, you’ll need to take a more aggressive approach:
- Use a paint stripper containing methylene chloride applied thickly according to directions
- Allow stripper to sit for 15+ minutes before scraping away coating
- Repeat stripper application to remove stubborn remnants
- Sand or grind down to fully remove all remaining texture
- Wipe clean with denatured alcohol and rinse thoroughly
Removing Tough As Tile takes strong solvents and manual labor. Be sure to work in a well-ventilated area and take appropriate safety precautions.
If possible, applying new tile or resurfacing over the existing material may be easier than removing, especially on textured surfaces like concrete. Test compatibility if going over old Tough As Tile rather than removing.
What Tools Do I Need to Apply Homax Tough As Tile?
Tough As Tile can be easily applied with basic DIY tools:
- High quality synthetic bristle brush – Angled sash brush for cutting in edges
- Short nap roller – 3/8″ nap size recommended
- Paint tray – To hold coating while applying with roller
- Drop cloths – To protect floors and surfaces from splatters
- Stirring stick – To mix coating thoroughly before and during application
- ** painter’s tape** – To mask off surfaces you don’t want coated
- Sandpaper – 150 grit to sand glossy surfaces for prep
- TSP substitute – To thoroughly clean and degrease surfaces before applying
No special application tools are required. Use high quality brushes and rollers to prevent excessive lint and debris in the coating. Proper prep with TSP cleaner and sandpaper are essential as well.
Are There Different Colors Available for Homax Tough As Tile?
Homax Tough As Tile only comes pre-tinted in an off-white color resembling grout. However, the coating can be tinted at home with universal colorants. Mix in up to 2 oz. of colorant per gallon.
Be aware that darker colors may require an extra coat for full opacity. Test colored samples before committing to the entire project.
Alternatively, concrete stains can be used to transform white Tough As Tile into colors like brown, green, blue/gray and more. Apply in thin layers to reach the desired hue.
If needed, an epoxy paint made for tile can also be used but may partially smooth the texture. For best results, tint the Tough As Tile itself versus painting over it.
How Do I Clean Surfaces Coated with Homax Tough As Tile?
For routine cleaning:
- Use a non-abrasive pH-neutral cleaner
- Avoid harsh chemicals like bleach or ammonia
- Use a soft sponge or cloth – abrasive scouring can damage the finish
In bathrooms:
- Wipe down after showering to prevent soap scum buildup
- Squeegee shower walls and surfaces to limit water exposure
- Recaulk as needed around joints to prevent moisture issues
In kitchens:
- Clean up spills quickly to prevent staining
- Use a cutting board to avoid gouges and wear
- Do not set hot pots or pans directly on the coating
With proper care, Tough As Tile can retain its look for many years before needing reapplication. Avoid abrasives and excessive moisture to keep it looking like new.
Can Homax Tough As Tile Be Used On Floors?
Homax does NOT recommend Tough As Tile for use on floors or any walking surface, even with a non-slip additive. For floors, consider these alternative options instead:
- Tile effect vinyl – Affordable, durable and mimics real tile
- Resurfacing concrete floors with texture and color tint
- Porcelain, ceramic or vinyl tile – Longer lasting but pricier install
Tough As Tile softens when water saturates the coating for prolonged periods. It also lacks the hardness needed for foot traffic. Use Homax Granite & Marble Countertop Sealing Tiles if you need a DIY floor transformation. Or consider full tile replacement for true durability.
How Do I Repair Chips in Homax Tough As Tile?
Minor chips or damage can be easily repaired:
- Sand the damaged area lightly to roughen the surface
- Clean and dry the area thoroughly
- Use a small brush to apply new Tough As Tile coating over the affected spot
- Feather out the fresh coating and blend into surrounding areas
For smoother repairs in highly visible areas:
- Mix coating with a small amount of drywall joint compound
- Fill and blend the patched area, sanding smooth when dry
- Reccoat the entire surface for an even finish
Address chips as soon as possible to prevent moisture issues or peeling. Prompt touch ups can keep your Tough As Tile surfaces looking great.
What is the Coverage Area for a Can of Homax Tough As Tile?
- 1 quart covers approx. 25 sq. ft.
- 1 gallon covers approx. 100 sq. ft.
- 2 gallons covers approx. 200 sq. ft.
Actual coverage varies based on the surface porosity and texture. Two full coats are required for proper coverage and durability. Porous or textured surfaces may use more material.
Buy the quantity needed for your specific project area plus 10% extra to ensure you don’t run short. Tinting the coating may also slightly reduce total coverage area. Allow the full drying time between coats.
How Do I Ensure a Smooth Finish with Homax Tough As Tile?
To minimize brush strokes and get an even finish:
- Use an angled sash brush for smooth cutting-in and hard to reach spots
- Roll on coats using a “W” or zig-zag motion without overworking
- Maintain a wet edge and work in sections to prevent lap marks
- Ensure the coating isn’t applied too thickly or it may sag
- Sand lightly between coats if necessary to smooth out imperfections
- Allow proper drying time between coats for best results
Proper surface prep, priming if needed, and careful application technique will ensure your Tough As Tile project cures to a beautiful, glossy tile finish.
Is Homax Tough As Tile Safe to Use Indoors?
Yes, when used as directed Homax Tough As Tile is low-odor and safe for indoor use. It’s water-based and low in VOCs compared to other resurfacing coatings. Open windows for airflow during application and initial curing.
Exercise typical safety precautions:
- No smoking, open flames or other ignition source
- Wear gloves and eye protection
- Wash hands after use and before eating
- Keep out of reach from children
Once fully cured, Tough As Tile forms an inert coating that poses no health hazards and can safely be used in living spaces. Always carefully read all safety information before beginning any project.
How Do I Store Unused Homax Tough As Tile?
To maintain quality of unused product:
- Seal the container tightly after each use
- Store in a dry area between 40-80°F
- Stir well before reusing to reincorporate solids
- Use within 2 years of purchase for optimal results
Avoid freezing temperatures or prolonged heat exposure as they can degrade the acrylic polymer over time. Tightly resealing and storing flat helps minimize air contact.
Before reuse, inspect consistency and stir thoroughly. Discard if it becomes tough to stir, stringy or leaves excessive residue on stir stick. Applying old, degraded coatings can cause poor adhesion and performance.
Conclusion
Homax Tough As Tile offers budget-friendly resurfacing for dated surfaces. With proper prep and application, it can mimic high-end tile for a fraction of the cost. Just be sure to follow all manufacturer guidelines carefully. Allow adequate cure times and perform routine maintenance to maximize durability. With this ultimate buying guide, you’ll be ready to tackle transforming projects with confidence.